Microsoft Dynamics 365 Business Central Security Groups
Managing user permissions can be one of the more intricate parts of system administration when setting up Business Central (BC). A system administrator might find themselves assigning permissions on a user-by-user basis, leading to significant ongoing maintenance and confusion over time over which users have access to what sensitive parts of the system. Luckily, Microsoft simplified this setup and maintenance issue by creating Security Groups – a joint effort between Microsoft Entra ID (formerly known as Azure Active Directory) and Business Central that makes managing user permissions a breeze.
Lets take a step back and review an earlier blog post discussing user permissions. In this post, we described how you can create nested permission sets in Business Central that contain all necessary permissions for a user’s role within a single “parent” permission set. Once you’ve set up your permission sets this way, all you need to do is assign the one “parent” permission set that corresponds to each user’s role to their User card in Business Central.

While this greatly simplifies the complexity of managing user permissions, there is still the need for an administrator to manually assign and remove permission sets from each user should their permission needs change. That’s where Security Groups come in.
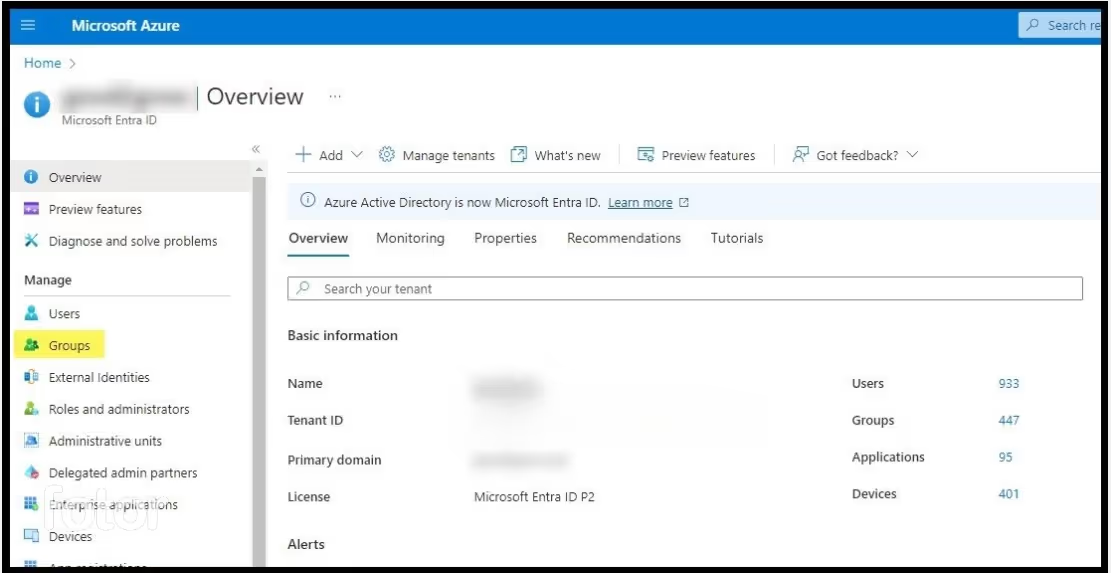
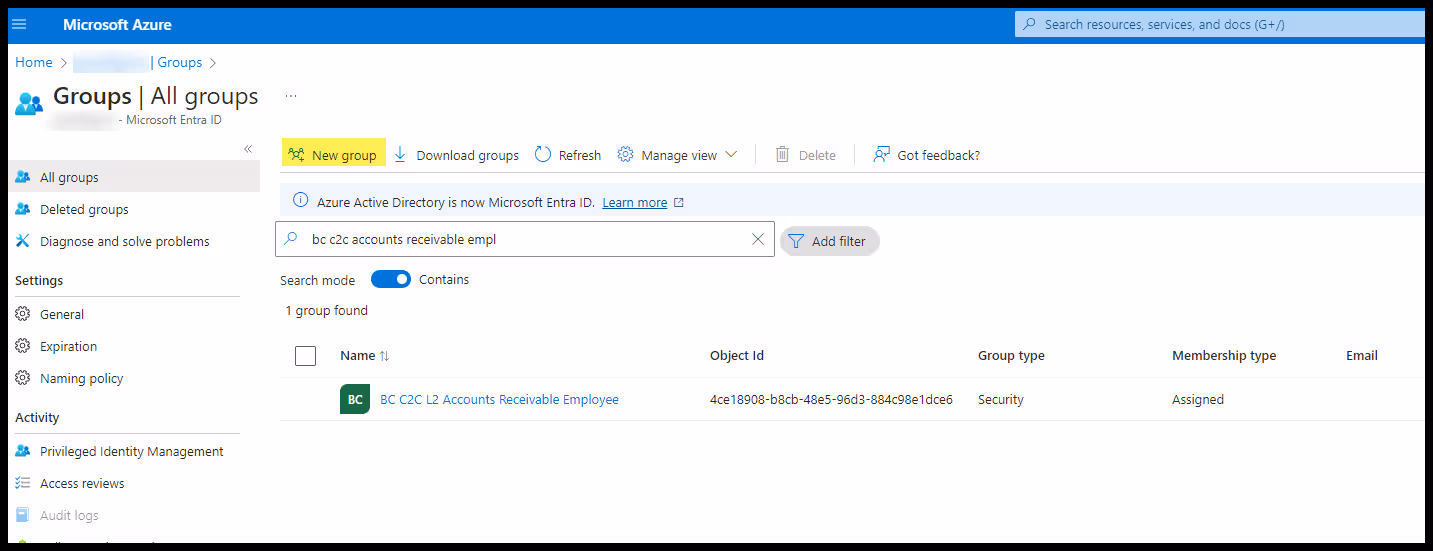
Upon opening the tenant’s Microsoft Entra ID portal, we can find the Groups tab on the left-hand side. From here, we can create a new Group, making sure that we choose “Security” as the Group type. Here is a security group called BC C2C L2 Accounts Receivable Employee, which will correlates with the permissions of a Level 2 Accounts Receivable user in BC. Once we’ve created the Security Group in Entra ID, we’ll assign it to the applicable users in our tenant.
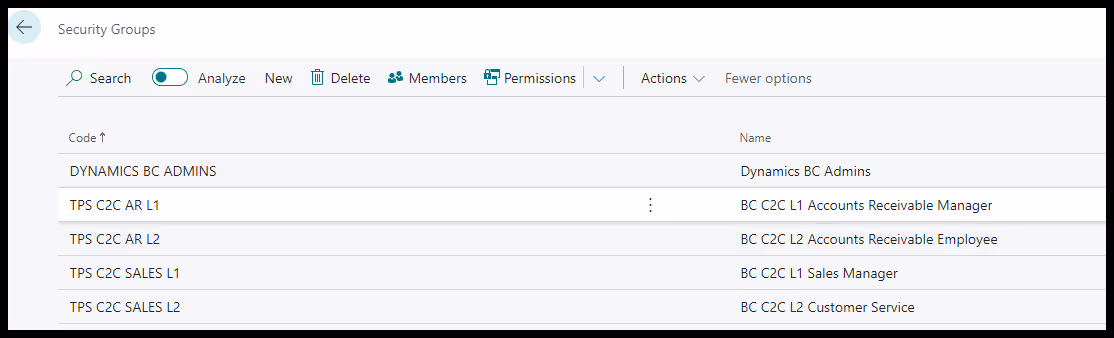
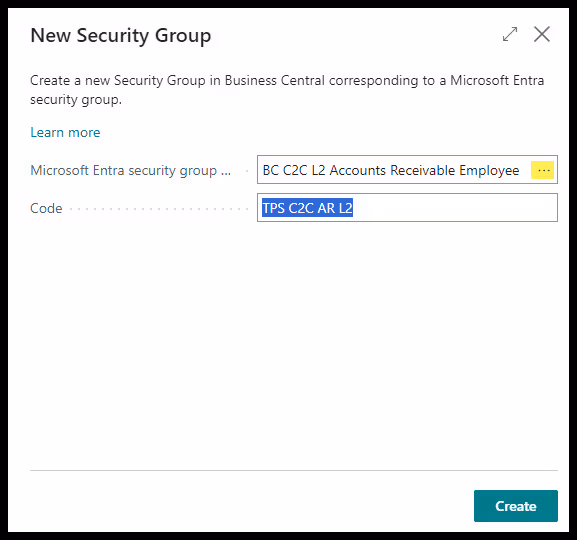
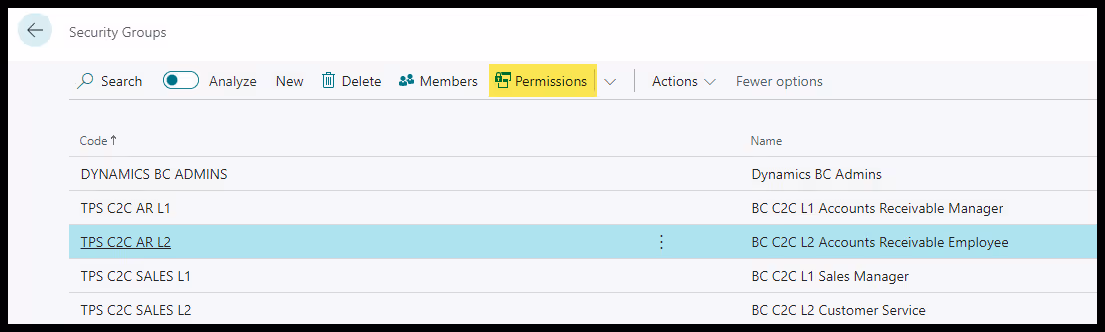
Back in Business Central, navigate to the Security Groups page. Here is a list of Security Group codes, and their associated Security Groups in the tenant’s Entra ID. To create a new Security Group, select New -> New and a window will pop up. Enter the name of the Security Group that was created in Entra ID (select the ellipses for a lookup of all available Security Groups in your tenant to select from) and then enter the name/code for this Security Group in BC, then select create.
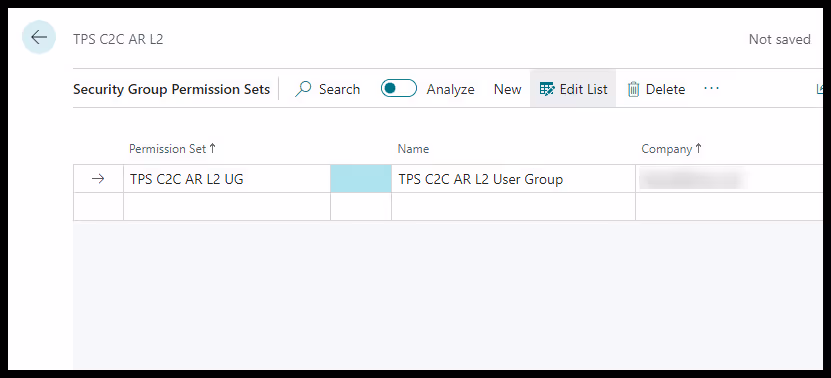
Next, assign permission sets to this Security Group in Business Central. With the line for the newly created Security Group selected, select Permissions. From here, simply add the permission sets to Security Group, then back out of the window to save the changes.
The necessary setups are now complete. Any users who are assigned to the “BC C2C L2 Accounts Receivable Employee” Security Group in the tenant’s Entra ID will now be automatically granted the TPS C2C AR L2 UG permission set if they have a BC license. Any changes made to the Security Group’s Permission Sets will automatically apply to each user. Navigating back to the user card, we can see these changes in effect.
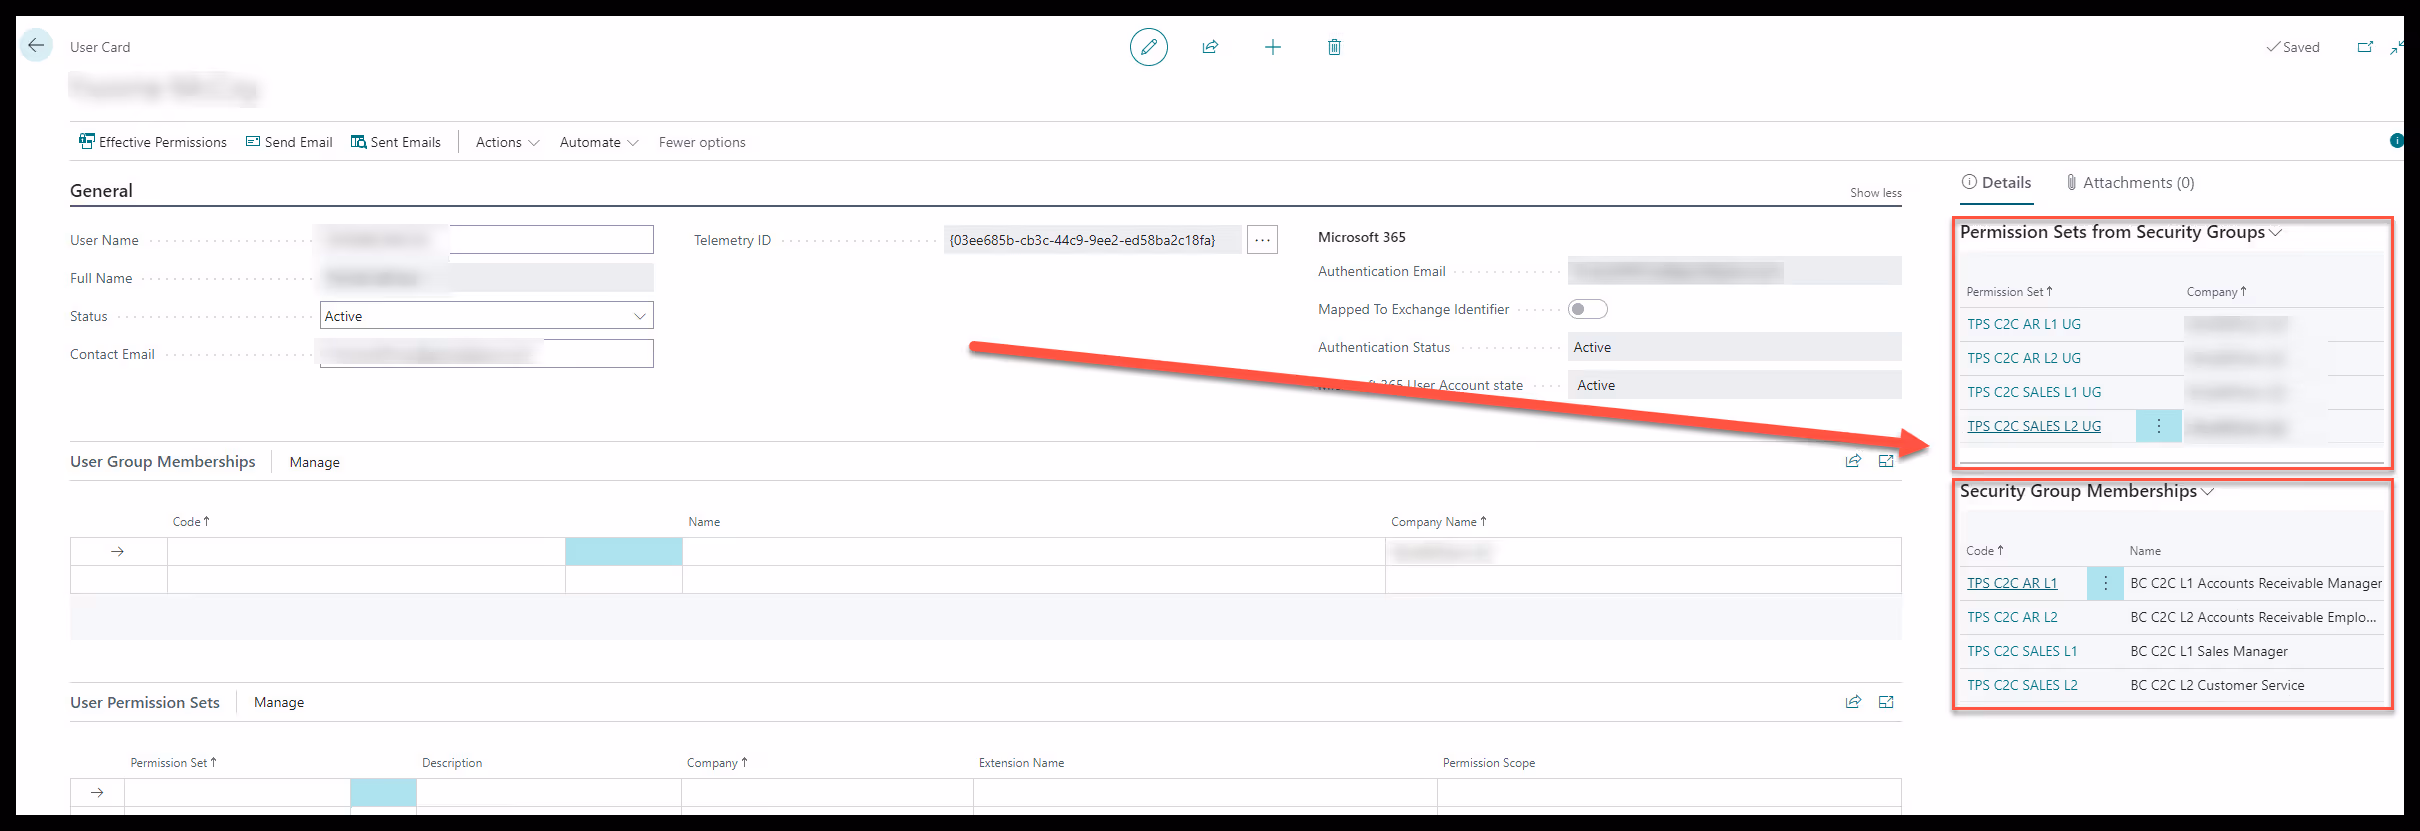
Looking at the far right of the page, we can see two sections of the Infobox which give us information about Security Groups assigned to the user and their associated Permissions. The Security Groups Memberships tab lists all the Security Groups set up in BC that are assigned to this user. The Permission Sets from Security Groups tab lists all the permission sets that are in the Security Groups assigned to this user.
Using Business Central Security Groups makes permission setup and ongoing management a breeze!
We hope this blog was of use to you. Check back for upcoming topics including multi-company setup strategies and reconciling inventory.
Ternpoint Solutions is a Microsoft Dynamics 365 Solutions Partner. We would love to hear from you, reach out using our contact us page.
Reach out to learn more about what we can do.
contact us
